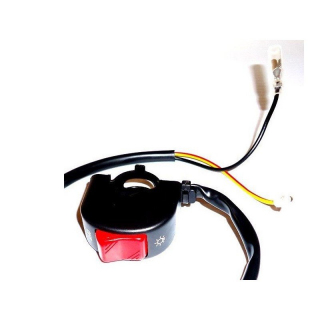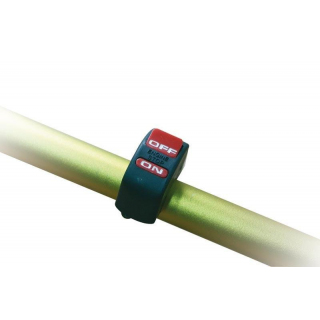



RFX Race OEM Start Button

| BRANDS | RFX |
|---|---|
| EAN | 5056070622548 |

PROMO
| Brand | Cylinder | Model | Year | Caractéristique |
|---|---|---|---|---|
| FANTIC | 250 | XEF 250 | 2022 | |
| FANTIC | 250 | XEF 250 | 2023 | |
| FANTIC | 250 | XEF 250 | 2024 | |
| FANTIC | 250 | XXF 250 | 2022 | |
| FANTIC | 250 | XXF 250 | 2023 | |
| FANTIC | 250 | XXF 250 | 2024 | |
| FANTIC | 450 | XEF 450 | 2022 | |
| FANTIC | 450 | XEF 450 | 2023 | |
| FANTIC | 450 | XXF 450 | 2022 | |
| YAMAHA | 250 | WR 250 | 2016 | |
| YAMAHA | 250 | WR 250 | 2017 | |
| YAMAHA | 250 | WR 250 | 2018 | |
| YAMAHA | 250 | WR 250 | 2019 | |
| YAMAHA | 250 | WR 250 | 2020 | |
| YAMAHA | 250 | WR 250 | 2021 | |
| YAMAHA | 250 | WR 250 | 2022 | |
| YAMAHA | 250 | WR 250 | 2023 | |
| YAMAHA | 250 | WR 250 | 2024 | |
| YAMAHA | 250 | YZ 250 F | 2019 | |
| YAMAHA | 250 | YZ 250 F | 2020 | |
| YAMAHA | 250 | YZ 250 F | 2021 | |
| YAMAHA | 250 | YZ 250 F | 2022 | |
| YAMAHA | 250 | YZ 250 F | 2023 | |
| YAMAHA | 450 | WR 450 F | 2016 | |
| YAMAHA | 450 | WR 450 F | 2017 | |
| YAMAHA | 450 | WR 450 F | 2018 | |
| YAMAHA | 450 | WR 450 F | 2019 | |
| YAMAHA | 450 | WR 450 F | 2020 | |
| YAMAHA | 450 | WR 450 F | 2021 | |
| YAMAHA | 450 | WR 450 F | 2022 | |
| YAMAHA | 450 | WR 450 F | 2023 | |
| YAMAHA | 450 | YZ 450 F | 2018 | |
| YAMAHA | 450 | YZ 450 F | 2019 | |
| YAMAHA | 450 | YZ 450 F | 2020 | |
| YAMAHA | 450 | YZ 450 F | 2021 | |
| YAMAHA | 450 | YZ 450 F | 2022 |
Description
Tonnycat vous propose :
RFX Race OEM Start Button de RFX
The RFX Race series buttons and switches are OEM replacement parts. They come with the same fittings, fasteners, connectors, and cable lengths as the original part.
Available for a wide range of motorcycles.
- OEM replacement
- Accepts all original connectors
- OEM cable length
Installation instructions:
- Start by removing the front plate.
- Carefully cut the cable ties holding the start and stop switch cables to the bars, then unscrew the clamps and let them hang.
- Locate the switch connector on the motorcycle, they are often found near the steering column on the frame, but sometimes under the tank.
- Detach the connector and remove the switch, noting the wire routing.
- Clean the connector using an electrical contact cleaner.
- Secure the new switch lightly on the handlebar at the desired location.
- Route the wires as on the old switch and reconnect the connector.
- Check the freedom of movement of the wires by turning the handlebar to the full and ensuring that the wires are not too tight, adjust if necessary.
- Reposition the cable ties on the wires, placing the cables behind the bars to avoid damage from debris.
- Replace your front plate.
| BRANDS | RFX |
|---|---|
| EAN | 5056070622548 |

Soyez le premier à poser une question sur ce produit !
In the same category :
-

-
-
-
-
-
-
-
- 1139477 HIGHSIDER smart Universal emergency stop switch PRO, type breakerwas €32.00 Special Price €29.45
-