Every motorcyclist has to service and replace his chain kit.
Here's a guide to help you :
maintain your chain kit ;
choose a new one when the time comes ;
and dismantle the old one for replacement.
Maintaining your motorcycle chain kit
Maintaining your chain kit is crucial for two reasons: to minimize the risk of accidents, and to extend the life of your chain kit.
Chain tension
It's essential to check your chain tension regularly. With a new kit, you need to check it even more often, to allow the chain to loosen up after the first few kilometers.
A chain that's too slack loses torque, while one that's too tight accelerates wear on the sprocket, chainwheel and chain. There's also a risk of breakage if you overload the suspension. In either case, you're exposing yourself to mechanical problems.
To carry out your check, the motorcycle must be in neutral, resting on a motorcycle lift. You'll need to adjust the tension according to the motorcycle and your riding style. For cross-country or enduro models, for example, you need to be able to slip three fingers between the swingarm and the chain, at the level of the chainstay.
To adjust your chain tension, unscrew the rear wheel with an open-end wrench and move it forwards or backwards. Both sides must be adjusted in the same way to keep the rear wheel aligned. The trick is to retighten the wheel once you've found the right position, by placing a wrench on a tooth between the chain and the sprocket. This allows you to lock on to the setting and maintain the desired tension.
Chain lubrication
Equally important, greasing the chain prolongs its life and ensures a perfectly smooth ride, without the jolts caused by an insufficiently supple chain.
After several successive lubrications, a thorough cleaning is welcome to remove the layers of grease and debris that have accumulated. Degrease the chain completely before applying a fresh, clean layer of grease. Never neglect the inner side of the chain, which is the least accessible but most useful.
Some examples of the best maintenance products for your chain kit:


Checking the state of wear of your chain kit
Like any good biker, you check your chain kit frequently, and you need to pay attention to the warning signs of wear. There are three factors to watch out for:
Loose chain links,
Wear on the sprocket and/or chainring becomes apparent,
Pull the chain to check that there isn't too much play between the teeth of the sprocket and the chain, which would indicate that the tension is too loose.
If you notice any of these three elements, you need to change your chain kit without delay. A broken chain means, firstly, the risk of a fall and an accident, and secondly, the certainty of serious damage to your motorcycle, particularly to the gearbox.
The chain kit consists of the chain, sprocket and sprocket. These parts are designed to age and die together, so make sure you change them all at once, unless one part has broken and the others are very new.
And while you're at it, take the opportunity to check the state of wear of the other vital parts that surround the chain kit: swingarm pads, chain guide and rollers.
Choosing the right chain kit for you
Another advantage of changing all three parts of the chain kit at the same time - sprocket, sprocket and chain - is that you don't need to worry about compatibility.


STEEL CHAIN KIT or ALU CHAIN KIT?
The sprocket
You can choose between three types of crown:
The heavy-duty steel crown. Ideal for quads, extreme conditions, cross-country and enduro riding. Best avoided on small displacement bikes and if you're looking for lightness to improve performance,
The aluminum crown is less resistant but very light. Ideal for motocross bikes or if you're looking for lightness, but it wears out much faster,
The aluminum-steel sprocket plays on the qualities of its two components: an aluminum body so as not to weigh the bike down, but steel teeth to better resist wear. The only drawback is its price, which is a little higher than the other two.
Standard chains come with forty-eight to fifty-two teeth, depending on whether you're looking for more acceleration or more length.

The sprocket
Again in steel, you can choose between 12 and 15 teeth, depending on whether you're looking for recovery or lengthening. If you need it, you can choose anti-mud sprockets.


The chain
You can choose between two types of chain:
The O-ring-less chain reduces resistance and therefore increases power. As there is no grease between the links, it wears out faster. This is the chain you choose for small-displacement and competition bikes.
O-ring chain is much more durable. O-rings prevent debris from jamming between links, and their grease provides permanent lubrication between them. This is the chain best suited to extreme conditions and enduro riding.
Chain reference
The chain pitch is the first digit of the reference number (420, 428 or 520 for the most common). This number represents the distance between two links. The second number corresponds to the width of the chain.
If you're buying a complete kit, no problem, but if you're buying your components separately, check their compatibility. Otherwise, you risk premature wear, or even a technical incident.

The gearing game
Every motorcycle is designed with its own gearing. However, you can make adjustments if you wish to adapt your bike to your riding style, whether it's more supple or lively. You can do this by varying the number of teeth on your gearbox output pinion or sprocket.
The principle is as follows
the smaller your pinion (with a smaller number of teeth than the original pinion),
the more responsive your bike,
the lower your top speed performance.
The same goes for a larger sprocket than the original.
It's up to you to find the right compromise!
How to change your motorcycle chain kit?
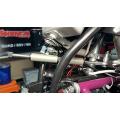
Install your machine on a motorcycle lift so that you're comfortable and can easily dismantle the parts.
To start with, dismantle your current chain kit. Use pliers to remove the chain's quick-release clip.
Now you can remove the rear wheel. To do this, loosen the nut that holds it in place. A good tip to avoid dirtying the axle of your wheel is to insert it into your muffler to protect it from any dirt.
Once your rear wheel has been removed, you have access to the sprocket you wish to replace. Remove the crown attached to the wheel and replace it with the new one. It's a good idea to change all the fixing screws at the same time - you don't want to cut corners on these small details, but they can jeopardize your safety.
When repositioning your rear wheel, grease your axle halfway. This will allow greasing to take place on the other half, once it's been repositioned. This is the best way to avoid excess grease spreading to unnecessary places.
Once the axle and wheel are perfectly repositioned, all that's left to do is tighten the nuts.
To change your sprocket, you'll need to remove it from your gearbox output. You'll need a pair of pliers to loosen the clip holding the sprocket in place. If you have a new motorcycle and you can't see how the clip works, refer to the manufacturer's manual.
Once you've removed the clip, you're free to remove your worn sprocket and replace it with the new one.
The final step is to reassemble your new chain using the quick-release fastener. You'll need a pair of pliers to help you pass the quick-release clips and secure the chain.
Check the tension of your chain and adjust it. All that's left is to grease your chain and you're ready to go! Enjoy your ride!